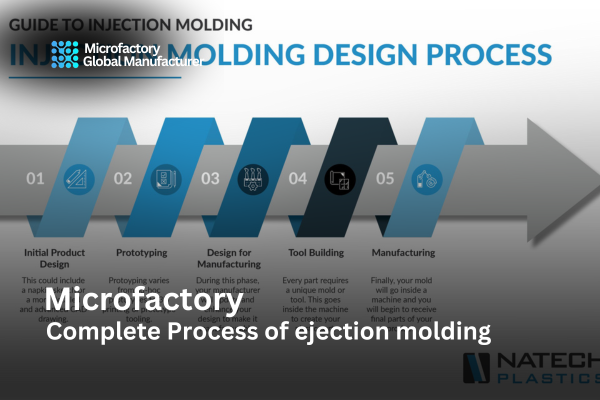
Complete Process of ejection molding is a fascinating and intricate manufacturing process that transforms raw materials into precisely molded products. Complete Process of ejection molding article delves into the complete process of ejection molding, covering every step from initial design to the final product. Whether you are an industry professional or a curious reader, this detailed guide will provide you with valuable insights into Complete Process of ejection molding essential manufacturing technique.
Table of Contents
Table of Contents
- Overview of Ejection Molding
- What is Ejection Molding?
- History and Evolution
- Materials Used in Ejection Molding
- Common Materials
- Selection Criteria
- The Ejection Molding Process
- Step-by-Step Breakdown
- Key Components
- Design Considerations
- Design for Manufacturability
- Tooling and Mold Design
- Quality Control and Testing
- Inspection Methods
- Common Defects and Solutions
- FAQs
- Frequently Asked Questions
- Conclusion
- Final Thoughts
Overview of Ejection Molding
What is Ejection Molding?
manufacturing process that involves injecting molten material into a mold to form a specific shape. This method is widely used for producing high-volume, complex parts with tight tolerances. The process is highly efficient and capable of producing identical parts with great consistency.
History and Evolution
The origins of ejection molding date back to the late 19th century. The first ejection molding machine was patented by John Wesley Hyatt and his brother Isaiah in 1872. Initially, the process was used for simple items like combs and buttons. Over the decades, advancements in materials, machinery, and technology have expanded the capabilities of ejection molding, making it a cornerstone of modern manufacturing.
Materials Used in Ejection Molding
Common Materials
Ejection molding can utilize a variety of materials, each chosen for its specific properties. Some common materials include:
- Thermoplastics: Such as polypropylene, polyethylene, and polystyrene.
- Thermosetting Plastics: Such as epoxy and phenolic resins.
- Elastomers: Such as silicone and rubber.
- Metals: Such as aluminum and zinc alloys.
- Ceramics: Used for high-temperature applications.
Selection Criteria
Selecting the right material for depends on several factors:
- Mechanical Properties: Strength, flexibility, and durability.
- Thermal Properties: Melting point and thermal conductivity.
- Chemical Resistance: Compatibility with other substances.
- Cost: Material cost and processing expenses.
- End-Use Requirements: Specific performance criteria and regulatory compliance.
The Ejection Molding Process
Step-by-Step Breakdown
The complete process of ejection molding involves several stages, each critical to the production of high-quality parts. Here’s a step-by-step breakdown:
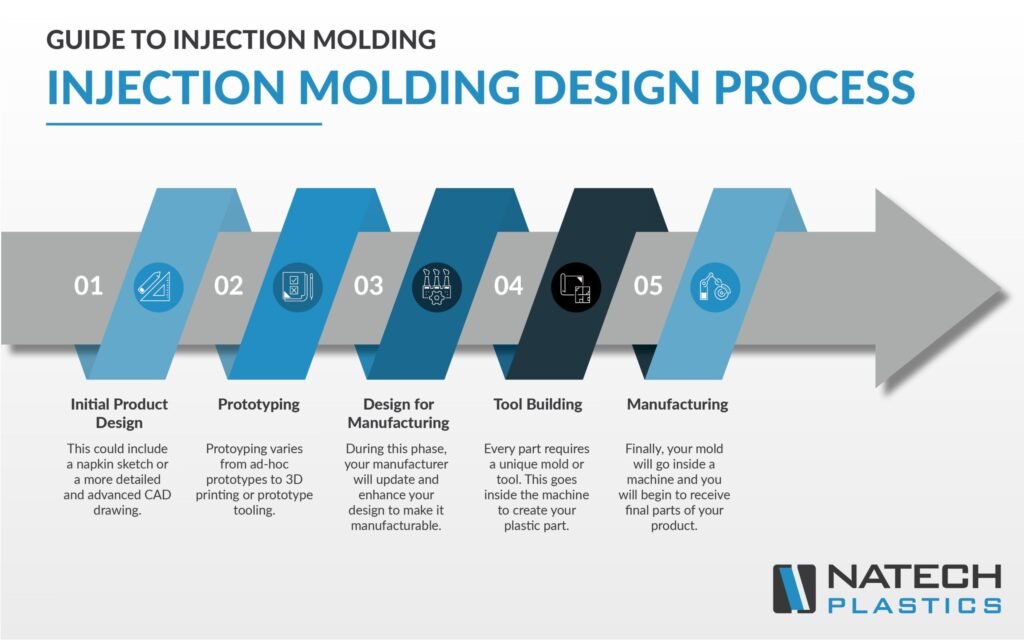
- Design and Prototyping:
- Conceptualization: The initial design is created based on the product requirements.
- Prototyping: A prototype is produced to validate the design and functionality.
- Mold Design and Manufacturing:
- Mold Design: Detailed CAD models are created for the mold.
- Mold Fabrication: The mold is manufactured using CNC machining, EDM, or other techniques.
- Material Preparation:
- Material Selection: The appropriate material is chosen based on the design requirements.
- Material Handling: The raw material is prepared and loaded into the molding machine.
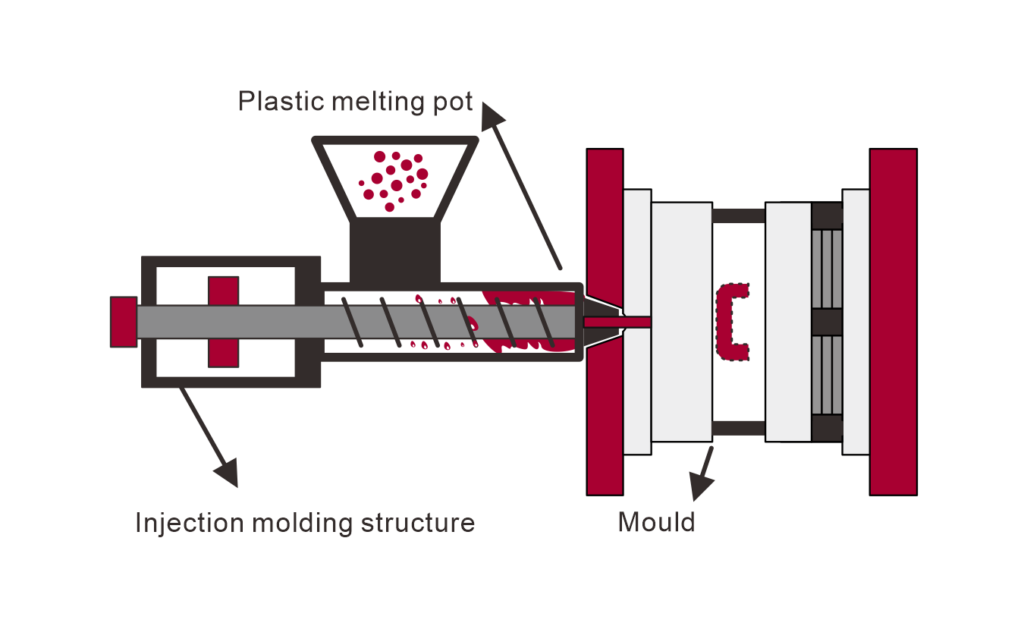
- Injection:
- Melting: The material is heated until it becomes molten.
- Injection: The molten material is injected into the mold cavity under high pressure.
- Cooling and Solidification:
- Cooling: The mold is cooled to allow the material to solidify.
- Ejection: The solidified part is ejected from the mold.
- Finishing:
- Trimming: Excess material, known as flash, is removed.
- Surface Treatment: Additional processes such as painting or coating may be applied.
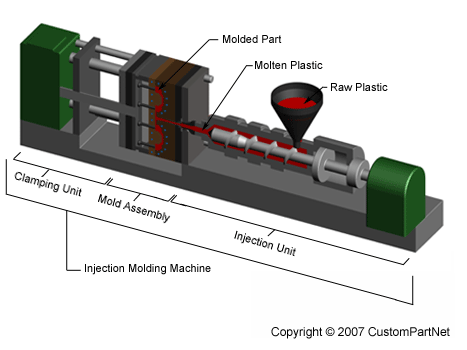
Key Components
The ejection molding process relies on several key components:
- Injection Unit: Heats and injects the material.
- Mold: Defines the shape of the part.
- Clamping Unit: Holds the mold in place and applies pressure.
- Ejection System: Removes the finished part from the mold.
Image of Complete Process of ejection molding
Design Considerations
Design for Manufacturability
Designing for ejection molding requires careful consideration of manufacturability:
- Draft Angles: Ensuring that parts can be easily ejected from the mold.
- Wall Thickness: Uniform wall thickness to avoid warping and sinking.
- Ribs and Bosses: Adding structural support without increasing weight.
Tooling and Mold Design
Tooling and mold design are critical to the success of ejection molding:
- Material Selection: Choosing the right material for the mold to ensure durability and precision.
- Cooling Channels: Designing efficient cooling channels to reduce cycle time.
- Gate Design: Ensuring proper material flow and minimizing defects.
Quality Control and Testing
Inspection Methods
Quality control is paramount to ensure that the final products meet specifications:
- Visual Inspection: Checking for surface defects and inconsistencies.
- Dimensional Inspection: Measuring critical dimensions using calipers, micrometers, and CMMs.
- Functional Testing: Ensuring that the parts perform as intended under real-world conditions.
Common Defects and Solutions
Despite meticulous planning, defects can occur in ejection molding. Some common defects include:
- Warping: Caused by uneven cooling or material shrinkage.
- Flash: Excess material that seeps out of the mold cavity.
- Short Shots: Incomplete filling of the mold cavity.
- Burn Marks: Discoloration due to overheating.
To address these issues, adjustments can be made to the mold design, material selection, or processing parameters.
FAQs
What are the advantages of ejection molding?
offers several advantages, including:
- High production efficiency and speed.
- Ability to produce complex and intricate designs.
- Consistent part quality and repeatability.
- Cost-effective for high-volume production.
How long does the ejection molding process take?
The cycle time vary depending on the material, part complexity, and mold design. Typically, the process can range from a few seconds to several minutes per part.
What industries use ejection molding?
Ejection molding is used in a wide range of industries, including automotive, electronics, medical devices, consumer goods, and aerospace.
Can ejection molding be used for low-volume production?
While most cost-effective for high-volume production, it can be used for low-volume production if the benefits of the process justify the tooling costs.
Conclusion
The complete process of ejection molding is a testament to the marvels of modern manufacturing. From material selection and mold design to the final inspection, each step is meticulously planned and executed to produce high-quality parts. Whether you’re a manufacturer looking to optimize your process or simply intrigued by the intricacies of ejection molding, this guide provides a comprehensive overview of the entire journey from concept to product. With continuous advancements in technology and materials, the future of ejection molding promises even greater efficiency and precision.